DIY Home Repairs: Save Money & Fix Common Problems

Advertisements
DIY home repairs empower homeowners to tackle common issues, from leaky faucets to drywall imperfections, saving significant money on professional services and gaining valuable skills in the process.
Embarking on DIY home repairs not only saves you hundreds of dollars but also equips you with invaluable skills to maintain and improve your living space. Let’s explore how you can confidently tackle these projects.
Advertisements
Why Choose DIY Home Repairs?
Opting for DIY home repairs offers a multitude of benefits beyond just saving money. It empowers you to take control of your living environment and gain a deeper understanding of how your home functions.
Choosing to do it yourself can also be a rewarding experience, providing a sense of accomplishment and pride in your handiwork.
Advertisements
Cost Savings
One of the most compelling reasons to embrace DIY home repairs is the potential for significant cost savings. Professional contractors can be expensive, and many common household issues can be resolved with a bit of know-how and elbow grease.
Skill Development
Engaging in DIY projects is a fantastic way to learn new skills and expand your knowledge of home maintenance. From plumbing to electrical work, each project offers an opportunity to gain practical experience.
- Independence: Mastering basic repairs reduces your reliance on external help.
- Problem-Solving: DIY fosters analytical and creative thinking to overcome challenges.
- Home Value: Well-maintained homes command higher resale values.
Doing your own repairs allows you to customize the work to your specific needs and preferences. You have complete control over the materials used, the design, and the overall quality of the finished product.
Essential Tools for DIY Home Repairs
Having the right tools on hand is crucial for successful DIY home repairs. A well-stocked toolbox can make even challenging projects manageable and ensure a professional-looking finish.
Investing in quality tools is a wise decision, as they will last longer and perform better than cheaper alternatives.
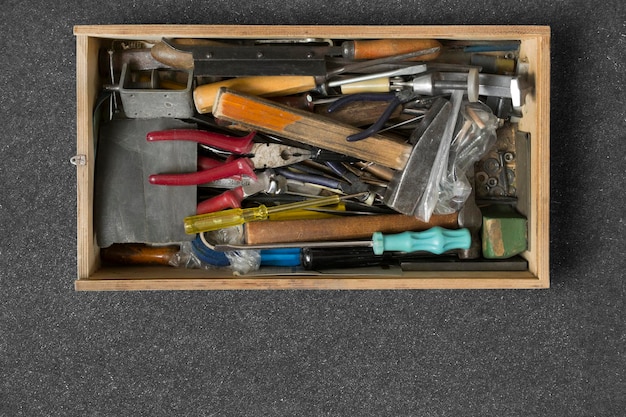
Basic Hand Tools
Every homeowner should have a basic set of hand tools, including a hammer, screwdrivers (Phillips and flathead), pliers, a wrench, a measuring tape, a level, and a utility knife. These tools are essential for most common household repairs.
Consider purchasing a tool set that includes a variety of sizes and types of screwdrivers and wrenches.
Power Tools
While not always necessary, power tools can greatly speed up and simplify many DIY repair projects. A power drill, saw, and sander are among the most useful power tools for homeowners.
- Safety Gear: Protect yourself with gloves, safety glasses, and ear protection.
- Cordless Options: Cordless power tools offer greater flexibility and convenience.
- Tool Maintenance: Keep your tools clean, sharp, and properly stored.
Proper storage and maintenance of your tools will ensure they are always ready when you need them. Consider investing in a tool chest or cabinet to keep your tools organized and protected.
Fixing Common Plumbing Problems
Plumbing issues are a common source of frustration for homeowners. However, many minor plumbing problems can be easily resolved with a few simple tools and a bit of patience.
Knowing how to tackle these issues yourself can save you time and money on costly plumbing repairs.
Leaky Faucets
A dripping faucet can waste a significant amount of water over time. Fortunately, fixing a leaky faucet is often a simple matter of replacing a worn-out washer or O-ring.
Before beginning any plumbing repair, be sure to turn off the water supply to the fixture.
Clogged Drains
Clogged drains are another common plumbing problem. In many cases, you can clear a clogged drain using a plunger or a drain snake. For more stubborn clogs, you may need to remove the drain trap and clean it out.
- Drain Cleaners: Use chemical drain cleaners with caution, as they can damage pipes.
- Prevention: Prevent clogs by avoiding dumping grease or food scraps down the drain.
- Professional Help: For complex plumbing issues, consult a licensed plumber.
Regular maintenance of your plumbing system can help prevent many common problems. Flush your water heater annually to remove sediment, and inspect your pipes for leaks on a regular basis.
Tackling Basic Electrical Repairs
Electrical repairs can be intimidating, but many basic electrical tasks are within the capabilities of a confident DIYer. However, it’s essential to prioritize safety and follow proper procedures when working with electricity.
Always turn off the power at the breaker box before starting any electrical work and double-check with a voltage tester to ensure the circuit is de-energized.
Replacing Outlets and Switches
Replacing a worn-out outlet or switch is a relatively simple electrical repair. Be sure to use the correct type of replacement outlet or switch, and always follow the manufacturer’s instructions.
When connecting wires to the new outlet or switch, make sure the connections are tight and secure.
Fixing Light Fixtures
Troubleshooting and repairing light fixtures can also be a straightforward task. Often, a non-working light fixture is simply the result of a burned-out bulb or a loose connection.
- Wiring: Use properly rated wiring for all electrical repairs.
- Inspections: Have a qualified electrician inspect your work to ensure it is safe and up to code.
- Smoke Detectors: Regularly test and replace batteries in smoke detectors.
If you are uncomfortable working with electricity, it is always best to call a qualified electrician. Never attempt electrical repairs that you are not confident in performing safely.
Addressing Common Drywall Issues
Drywall is a common material in homes, yet it’s prone to dents, holes, and cracks. Learning how to repair drywall can keep your walls looking their best and prevent further damage.
Small drywall repairs can often be completed in a single afternoon, while larger repairs may require multiple steps and additional drying time.
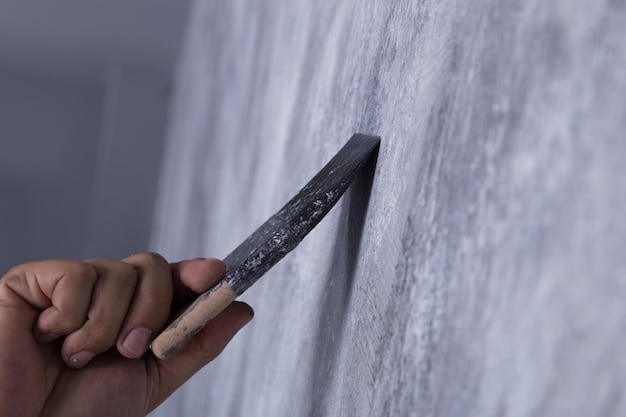
Patching Small Holes
Small holes in drywall can be easily patched using spackle or joint compound. Simply apply the compound to the hole, smooth it out with a putty knife, and allow it to dry. Once dry, sand the patched area smooth and paint to match the surrounding wall.
For larger holes, you may need to use a mesh patch or a piece of drywall to provide support.
Repairing Cracks
Cracks in drywall are often caused by settling or changes in humidity. To repair a crack, first widen the crack slightly with a utility knife. Then, apply joint compound to the crack, smooth it out, and allow it to dry. Sand the patched area smooth and paint to match the surrounding wall.
- Sanding: Use a fine-grit sandpaper to avoid damaging the surrounding drywall.
- Priming: Prime the patched area before painting to ensure proper adhesion.
- Matching Paint: Take a sample of the existing paint to the hardware store to ensure a perfect match.
Proper preparation and attention to detail are essential for achieving a seamless drywall repair. Take your time and don’t be afraid to apply multiple coats of compound to achieve a smooth, even finish.
Maintaining and Repairing Woodwork
Woodwork, including trim, molding, and furniture, adds character and warmth to any home. Proper maintenance and timely repairs can keep your woodwork looking beautiful for years to come.
Regular cleaning and polishing can help protect wood surfaces from damage and wear.
Fixing Scratches and Dents
Scratches and dents in woodwork can be easily repaired using wood filler or a touch-up marker. Simply apply the filler to the damaged area, smooth it out, and allow it to dry. Once dry, sand the area smooth and stain or paint to match the surrounding wood.
For deeper scratches, you may need to use a wood chisel to carefully remove the damaged wood before applying the filler.
Repairing Loose Joints
Loose joints in furniture can be repaired by applying wood glue to the joint and clamping it together until the glue dries. Use clamps to hold the joint firmly in place while the glue sets.
- Wood Glue: Choose a high-quality wood glue for strong, lasting repairs.
- Clamps: Use a variety of clamps to accommodate different shapes and sizes.
- Finishing: Protect repaired woodwork with a coat of varnish or sealant.
With proper care and maintenance, your woodwork can remain a beautiful and valuable asset to your home for generations. Take the time to address minor repairs promptly to prevent more significant damage in the future.
| Key Point | Brief Description |
|---|---|
| 🛠️ Essential Tools | Having the right tools can simplify any DIY repair. |
| 💧 Plumbing Fixes | Simple solutions for leaky faucets and clogged drains. |
| 💡 Electrical Safety | Always turn off power before any electrical work. |
| 🧰 Drywall Repair | Easy fixes for holes and cracks in your walls. |
Frequently Asked Questions
▼
Common DIY repairs include fixing leaky faucets, unclogging drains, patching drywall holes, replacing light fixtures, and repairing scratched woodwork. These are often simple to tackle with the right tools.
▼
Savings vary, but you can save hundreds or even thousands of dollars by doing repairs yourself. Labor costs often make up a significant portion of a contractor’s bill.
▼
Basic electrical repairs like changing a light switch are generally safe if you follow proper safety precautions. Always turn off the power at the breaker and double-check with a voltage tester.
▼
A basic toolkit should include a hammer, screwdrivers (Phillips and flathead), pliers, a wrench, a measuring tape, a level, and a utility knife. Consider adding a power drill and saw for more complex tasks.
▼
Call a professional for complex electrical or plumbing issues, structural repairs, or anything that makes you feel uncomfortable. It’s best to err on the side of caution to ensure safety.
Conclusion
By embracing DIY home repairs, you not only save money but also gain invaluable skills and a sense of accomplishment. With the right tools, knowledge, and a focus on safety, you can confidently tackle a wide range of common household problems and maintain your home in top condition.