US Home Winter Prep: Your 7-Day Home Readiness Checklist

Advertisements
Preparing your home for winter is crucial for safety, efficiency, and comfort, and this comprehensive Is Your Home Ready for Winter? A 7-Day Checklist for US Homeowners provides a structured, actionable plan to tackle essential tasks in just one week, ensuring your property is fully protected against the cold, snow, and ice.
Advertisements
As the days shorten and a crisp chill fills the air, many US homeowners begin to ponder a critical question: Is Your Home Ready for Winter? A 7-Day Checklist for US Homeowners offers a proactive, week-long approach to ensure your property is not only prepared but also protected against the season’s harsh realities, guaranteeing peace of mind and comfort as temperatures drop.
Day 1: Exterior Scrutiny and Gutter Care
The first step in any robust winter preparation plan involves a thorough inspection of your home’s exterior, focusing on areas vulnerable to moisture and cold damage. Addressing these issues early can prevent more significant problems and costly repairs down the line.
Advertisements
Roof Inspection and Repair
Your roof is the primary shield against winter elements. Before the snow and ice arrive, it’s essential to perform a visual check, either from the ground with binoculars or, if safe, directly from the roof. Look for any compromised areas.
- Missing or damaged shingles: These can allow water to penetrate, leading to leaks and structural issues.
- Loose flashing around chimneys and vents: Properly sealed flashing is critical to prevent water intrusion.
- Excessive moss or algae growth: This can trap moisture and degrade roofing materials over time, especially in freezing conditions.
Addressing these small repairs now can save thousands later. Consider hiring a professional roofing contractor if you’re uncomfortable with heights or suspect significant damage.
Gutter Cleaning and Downspout Check
Clogged gutters are a primary cause of ice dams and foundation problems. Leaves, twigs, and other debris can accumulate, preventing proper water drainage.
Ensuring your gutters are clear allows melting snow and rain to be diverted away from your home’s foundation. Extend downspouts at least six feet away from the foundation to prevent pooling water from freezing and potentially cracking the concrete.
A simple flush with a garden hose can confirm proper flow. If you have significant tree coverage, consider installing gutter guards to minimize future cleaning efforts.
By meticulously examining your home’s exterior and maintaining your gutters, you lay a solid foundation for winter readiness. This proactive approach helps safeguard against water damage, one of the most common and destructive winter issues for homes.
Day 2: Secure Windows and Doors
Windows and doors are common culprits for heat loss, contributing to higher energy bills and discomfort. On day two, the focus shifts to sealing these openings to keep the warmth in and the cold out. This task is often overlooked but yields significant benefits for energy efficiency.
Weatherstripping and Caulking
Take a closer look at the perimeter of all your windows and doors. Air leaks can be surprisingly large when accumulated across multiple openings. Replacing old, cracked, or worn weatherstripping is a straightforward and effective way to reduce drafts.
- Test for drafts: Light a candle or incense stick near closed windows and doors on a windy day. If the flame flickers or smoke wavers, you have a leak.
- Apply new weatherstripping: Choose from various types like adhesive-backed foam, felt, or V-strip, suitable for different gaps and door/window styles.
- Caulk gaps: Use exterior-grade caulk to seal any cracks or openings around window and door frames. This creates a durable barrier against air and moisture.
Even small imperfections can allow a remarkable amount of cold air to enter your home, making your heating system work harder. By meticulously sealing these entry points, you create a more airtight envelope, significantly improving your home’s energy retention.
Insulate Windows with Film Kits
For older, less efficient windows, temporary shrink-wrap film kits can provide an additional layer of insulation. These kits are relatively inexpensive and easy to install, creating an insulating air pocket that helps prevent heat from escaping. While not a permanent solution, they offer a noticeable improvement in thermal efficiency.
Using these kits involves cleaning the window frame, applying double-sided tape, stretching the film taut, and then shrinking it with a hairdryer. The result is a clear, tight seal that dramatically reduces drafts and heat loss through the glass itself.
Ensuring your windows and doors are properly sealed is a critical preventative measure against winter’s chill. It not only enhances comfort but also contributes significantly to energy savings, making your heating system more efficient throughout the colder months.
Day 3: Optimize Heating Systems for Efficiency
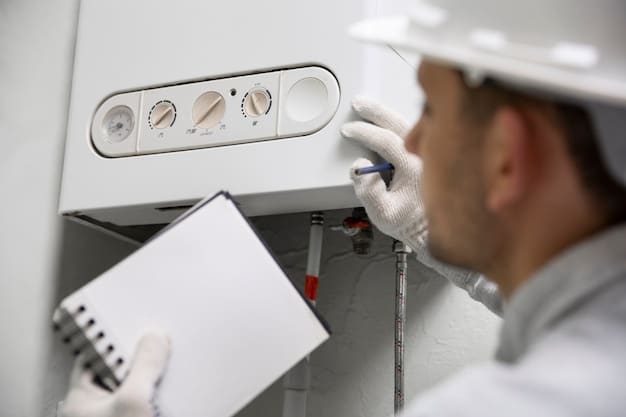
Your heating system is the heart of your home during winter. Day three is dedicated to ensuring it operates at peak efficiency, preventing breakdowns and maximizing warmth. Proactive maintenance is far less stressful and costly than emergency repairs in the middle of a cold snap.
Furnace Filters and Ducts
A dirty furnace filter restricts airflow, forcing your furnace to work harder and consume more energy. It also reduces indoor air quality. Replace disposable filters monthly or clean reusable ones regularly, especially during heavy use seasons.
Additionally, inspect your ductwork for any visible leaks or disconnections. Leaky ducts can lose a significant amount of heated air before it reaches your living spaces. Sealing these leaks with mastic sealant or metallic tape can improve system efficiency and ensure warmth is distributed effectively throughout your home.
Ensuring clean filters and sealed ducts is a simple yet impactful step. These small actions contribute significantly to the overall health and efficiency of your heating system, providing consistent warmth without unnecessary energy expenditure.
Thermostat Check and Upgrade
Test your thermostat to ensure it’s functioning correctly. If you’re still using an older, non-programmable model, consider upgrading to a smart thermostat. These devices can learn your schedule, allow remote control, and optimize heating based on external temperatures, leading to substantial energy savings.
Programmable thermostats allow you to set lower temperatures when you’re away or asleep, and boost heating just before you return or wake up, creating a comfortable environment precisely when needed without wasting energy on unoccupied spaces. This intelligent use of your heating system is key to both comfort and cost savings.
Professional HVAC Inspection
Even with DIY efforts, a professional HVAC inspection is highly recommended annually. Technicians can identify hidden issues, clean internal components, check refrigerant levels, and ensure all parts are functioning safely and efficiently. This preventative measure can extend the life of your furnace and prevent unexpected breakdowns when you need it most.
A professional eye can spot problems such as worn belts, failing igniters, or potential carbon monoxide leaks, which are critical safety concerns. Investing in a professional check provides invaluable peace of mind, knowing your heating system is ready to reliably keep your family warm throughout the winter season.
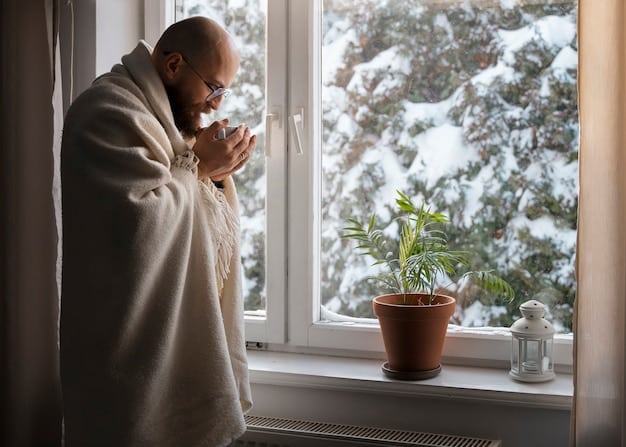
Day 4: Plumbing Protection and Water Heater Maintenance
Frozen pipes are a nightmare for any homeowner, causing extensive water damage and expensive repairs. Day four focuses on safeguarding your plumbing system and ensuring your water heater is ready for increased demand.
Insulate Exposed Pipes
Pipes in unheated areas like basements, crawlspaces, or outside walls are most susceptible to freezing. Insulate these pipes using foam pipe insulation sleeves, which are inexpensive and easy to install. Even a small drop in temperature can cause water in exposed pipes to freeze and burst.
- Identify vulnerable pipes: Look for pipes close to exterior walls or in poorly insulated spaces.
- Install foam sleeves: Cut sleeves to size and secure them around pipes.
- Wrap outdoor faucets: Disconnect garden hoses and wrap outdoor spigots with insulation bags or towels.
Taking this preventative step is far less costly and disruptive than dealing with burst pipes and the subsequent water damage, which can be significant. Ensuring all exposed pipes are well-insulated is a non-negotiable step in winter preparation.
Drain Outdoor Faucets and Sprinkler Systems
Before the first hard freeze, it’s essential to drain any outdoor faucets and sprinkler systems. Turn off the water supply to these lines, open the spigots to allow water to drain, and then close them. If you have an in-ground sprinkler system, follow the manufacturer’s instructions for winterization, which often involves blowing out the lines with compressed air.
Failure to drain these systems can lead to water freezing in the pipes, expanding, and causing them to burst. This can go unnoticed until spring, by which time significant damage may have occurred to both the pipes and your landscaping.
Water Heater Flush
Sediment build-up at the bottom of your water heater can reduce its efficiency and shorten its lifespan. Flushing your water heater annually removes these deposits, ensuring it heats water more efficiently and prevents premature corrosion. Follow your water heater’s manual for specific instructions on how to perform a flush, which typically involves turning off the power/gas, shutting off the cold water supply, and draining a few gallons from the tank.
This simple maintenance task improves the performance and longevity of your water heater, a critical appliance when hot water demand typically increases during colder months. A well-maintained water heater ensures a steady supply of hot water for your winter needs.
By dedicating time to your plumbing, you protect your home from some of the most destructive and inconvenient winter-related issues. These actions are invaluable for preventing costly emergencies and maintaining a functional household.
Day 5: Landscape and Yard Readiness
Winter elements aren’t just a threat to your home’s structure; they can also damage your landscaping and create hazards in your yard. Day five focuses on preparing your outdoor spaces to withstand the cold and snow.
Prune Trees and Shrubs
Inspect trees and shrubs near your home for dead or weak branches. Heavy snow and ice can cause these branches to break, potentially falling on your roof, windows, or power lines. Pruning them now can prevent property damage and ensure safety.
- Identify problematic branches: Look for branches that are dead, diseased, or overhanging your home or driveway.
- Professional help: For large trees or branches close to power lines, hire a certified arborist to ensure safe removal.
- Enhance plant health: Proper pruning also promotes overall plant health and growth in the spring.
Beyond safety, removing dead wood can prevent fungal diseases and pest infestations that might otherwise take hold during winter, affecting the health of your entire landscape next season. This is an investment in both safety and the long-term vitality of your garden.
Store Garden Hoses and Tools
Disconnect and drain all garden hoses, then store them indoors to prevent freezing and cracking. Similarly, clean and store all garden tools, furniture, and decorative items that are not weather-resistant. This prevents damage, prolongs their lifespan, and keeps your yard tidy and safe.
Leaving hoses connected can even cause water to back up into interior pipes, leading to freezing and bursting indoors. Emptying pots and storing them upside down can prevent them from cracking due to freeze-thaw cycles.
Prepare Your Lawn
Give your lawn one final cut before winter, keeping it slightly shorter than usual to prevent mold and mildew growth under prolonged snow cover. If fall fertilization wasn’t done, consider a winterizer fertilizer to nourish roots and promote early spring growth.
Aerating your lawn can also improve drainage and nutrient absorption, making it more resilient to winter stress. By taking these steps, you help ensure your lawn will emerge healthier and greener in the spring, reducing recovery time and effort.
A well-prepared yard not only looks better but also minimizes potential hazards and additional work once spring arrives. This day’s tasks are crucial for both aesthetic and practical purposes, protecting your property’s exterior elements from winter’s impact.
Day 6: Safety and Emergency Preparedness
While preparing your home for physical resilience against winter is vital, ensuring the safety of your family and having an emergency plan is equally, if not more, important. Day six is dedicated to these crucial aspects of winter readiness.
Check Smoke and Carbon Monoxide Detectors
With increased use of heating systems and potential for power outages leading to alternative heating methods, the risk of carbon monoxide poisoning and fires rises. Test all smoke and carbon monoxide detectors, replacing batteries if needed. Ensure you have detectors on every level of your home, and particularly near sleeping areas.
These devices are your first line of defense against unseen dangers. A functioning carbon monoxide detector can literally save lives, as carbon monoxide is an odorless, colorless gas produced by incomplete combustion that can be fatal. Smoke detectors provide crucial early warning in case of a fire, allowing precious time for evacuation.
Assemble an Emergency Kit
Power outages are a common occurrence during severe winter weather. Have an emergency kit readily accessible that includes:
- Flashlights and extra batteries: Essential for navigating your home in the dark.
- First-aid supplies: For minor injuries and medical emergencies.
- Non-perishable food and water: At least a 3-day supply per person.
- Blankets or sleeping bags: To stay warm if heating is lost.
- Battery-powered or hand-crank radio: To receive weather updates and emergency broadcasts.
- Phone chargers and power banks: To keep communication devices operational.
Consider also having a supply of cash, as ATMs and card readers may not work during power outages. Having a well-stocked kit can significantly reduce stress and enhance safety during unexpected events. This preparation is not just about convenience; it’s about self-sufficiency when external services might be disrupted.
Review Fire Safety and Escape Routes
Ensure everyone in your household knows what to do in case of a fire. Review escape routes from each room, designate a safe meeting point outside, and practice the plan. Make sure fireplaces and wood-burning stoves are cleaned and inspected professionally before use.
Clear any combustible materials away from heating sources, and never use ovens or outdoor grills as indoor heating sources due to the risk of fire and carbon monoxide. These preventative safety measures are vital for protecting your family from the heightened risks associated with winter heating.
Completing these safety checks offers critical protection and peace of mind. Knowing that you have prepared for potential emergencies allows you to face winter with greater confidence, ensuring the well-being of everyone under your roof.
Day 7: Final Touches and Ongoing Vigilance
On the final day of your checklist, it’s time to tie up any loose ends and establish routines for ongoing vigilance throughout the winter months. Winter preparation isn’t a one-time event; it’s a season-long commitment.
Reverse Ceiling Fan Direction
Many ceiling fans have a switch that allows you to reverse the direction of their blades. In winter, set your fans to rotate clockwise at a low speed. This pulls cool air up and pushes warm air, which naturally rises, back down into the living space, making your room feel warmer and potentially reducing heating costs.
This simple adjustment can significantly improve heat distribution, particularly in rooms with high ceilings, creating a more uniform temperature and reducing the feeling of cold spots. It’s an often-overlooked trick that leverages existing home features for better efficiency.
Stock Up on Winter Essentials
Ensure you have a supply of crucial winter items before the snow hits. This includes bags of rock salt or pet-friendly ice melt for walkways, snow shovels, and if applicable, fuel for generators or wood for fireplaces. Having these items on hand means you won’t be caught unprepared during the first snowstorm.
Think about what you’ll need for maintaining safe access around your home and for coping with potential utility disruptions. Snow removal equipment and de-icing agents are critical for preventing slips and falls on your property.
Perform a Final Walk-Through
Take one last comprehensive walk-through of your property, both inside and out. Double-check that all tasks from the previous days have been completed. Look for anything you might have missed—a forgotten hose, an unsealed window, a vulnerable plant. This final inspection helps solidify your preparedness.
Consider areas like the garage, ensuring any stored liquids that could freeze are moved to a warmer spot. Verify that all outdoor furniture covers are secure and that any sensitive garden elements are adequately protected from frost. This comprehensive review provides a final confirmation of your readiness.
Establish Winter Maintenance Routines
Winter preparedness is an ongoing process. Throughout the season, remember to:
- Monitor pipes: During extreme cold snaps, leave cabinet doors open under sinks on exterior walls to allow warmer air to circulate around pipes.
- Check walkways: Keep snow and ice clear from paths and driveways to prevent slips and falls.
- Monitor heating bills: Keep an eye on your energy consumption to spot any unexpected spikes that might indicate an efficiency issue.
By establishing these routines, you maintain a proactive approach to winter home care, ensuring your house remains a warm, safe haven throughout the coldest months. This vigilance will pay dividends in sustained comfort and reduced risk of unexpected problems.
| Key Task | Brief Description |
|---|---|
| 🏠 Exterior Check | Inspect roof, clean gutters, secure siding against winter elements. |
| 🌡️ Heating System Prep | Replace furnace filters, check thermostat, consider professional HVAC service. |
| 💧 Plumbing Protection | Insulate pipes, drain outdoor faucets, flush water heater to prevent freezing. |
| 🆘 Safety & Emergency | Test detectors, prepare emergency kit, review fire escape routes. |
Frequently Asked Questions About Winter Home Preparedness
The most crucial step is undoubtedly ensuring your heating system is in top working order and all major air leaks are sealed. A well-maintained furnace, coupled with properly sealed windows and doors, prevents heat loss, reduces energy bills, and ensures a comfortable indoor environment throughout the coldest months, protecting your family and property.
It’s advisable to clean your gutters at least twice in the fall, once during peak leaf-shedding season and again just before the first hard freeze. This ensures all debris is removed, preventing ice dams and proper water drainage, which is crucial for protecting your roof and foundation from water damage caused by melting snow and ice.
Neglecting winter preparation can lead to several costly and dangerous issues, including burst pipes, ice dams causing roof damage, increased energy bills due to inefficient heating, fire hazards from poorly maintained heating systems, and personal injury from icy walkways. Proactive measures mitigate these significant risks for homeowners.
Yes, reversing your ceiling fans to rotate clockwise at a low speed in winter is a simple yet effective energy-saving trick. This action pushes warm air, which naturally rises, back down into the living space, creating a more even temperature distribution and reducing the workload on your heating system, ultimately saving you money on utility bills.
The best time to start winterizing your home is generally in late summer or early fall, typically September or October in most US regions. This allows you to complete tasks before temperatures drop significantly and harsh weather conditions set in, providing ample time to address any unexpected issues without the pressure of imminent cold.
Conclusion
Preparing your home effectively for winter is more than just a seasonal chore; it’s an essential investment in the longevity, safety, and efficiency of your property. By following this comprehensive Is Your Home Ready for Winter? A 7-Day Checklist for US Homeowners, you can systematically address key areas from exterior maintenance to interior safety, transforming a potentially daunting task into a manageable week-long project. Proactive preparation prevents costly emergencies, lowers energy consumption, and provides the comfort and peace of mind you deserve when the cold weather arrives. A well-prepared home is a safe and warm sanctuary, ready to weather any storm the season brings.